So you want to save money by buying our unfinished or custom-finished kitchen cabinets. Can you also save money on the installation, which often doubles your overall costs? There are many projects and do-it-yourself (DIY) jobs in the average home that do not require bringing in a professional. Who doesn’t like saving money when we can successfully accomplish a project on our own, on our own schedule?

However, there are home projects that require the services of a trained, experienced, and licensed contractor. A project in the hands of someone that is not qualified could end up costing much more than hiring the correct professional in the first place. You can almost always save time (and possibly money) when the job is done correctly the first time. And you are better off handling dangerous or risky conditions with an expert. 

This rule of thumb is a good basic starting point: Do you have mechanical, electrical, or plumbing issues in your project? You might be skilled and knowledgeable enough to tackle one or more of these issues, and perhaps bring in a professional for the other items. 

I just need kitchen cabinets, do I need a contractor?

If you are only removing and replacing your existing cabinets, you might not need a contractor. This is often the case with very simple kitchen renovations. For example, if you can disconnect and reconnect the plumbing under your sink, your electrical outlets are staying and you’re not adding any new ones, you’re not changing your type of range, not adding a dishwasher, then you might not need a contractor.

Why would my renovation affect anything mechanical, electrical, or involve my plumbing?

Are you considering taking a wall down in your kitchen to create more space? Does your kitchen design include a new island that will need an electrical outlet? Are any of your appliance locations changing? At the very least, your plumbing will need disconnecting and reconnecting. While some of these items are usually straightforward tasks, there can certainly be more involved things that come up. 

If mechanical, electrical, or plumbing issues are involved, the rule of thumb is that these concerns should be handled by an expert who knows how to tackle any issues that may arise. Investing in this particular aspect of your project can avoid major costs required to fix DIY mistakes or gaps. And we are talking about your home, where your family lives; another reason your investment is well spent.

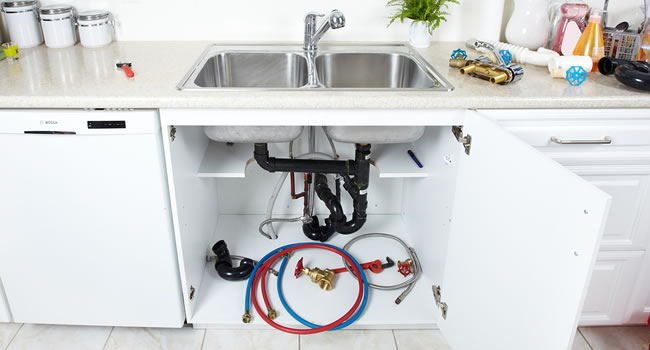
Kitchen Plumbing

What exactly is a contractor?

A contractor is an individual who helps you with either part of your new construction/remodeling project or who coordinates every aspect of your project. A contractor has knowledge of town permit requirements, available tradesmen for the particular jobs to be done, or may have his/her own skill set to accomplish your project.

As you approach your project in the planning stages, it’s a good idea to prepare a list including:

  1. Your project goals from top to bottom, ceiling to floor
  2. Your timeline, ideal start and finish dates
  3. Budget
  4. DIY items you would like to keep for yourself

Hiring a contractor for your kitchen project may save a significant amount of time and money in reaching your ultimate goal, leaving you to finish other projects in your home that are perfect for your level of DIY expertise.

Are you remodeling your kitchen, bathroom, or other rooms with new cabinets or bookcases? Installing them yourself can save money and allow you to spend your money on even better products. If you buy unfinished cabinets and paint or stain them yourself, you can save even more. Here is what you need to get the job done.

Depending on your level of carpentry skills and how many home improvement projects you do, you may already own some of the tools in this list. Not all items will be needed but many will be helpful depending if you are working alone or have assistance.

It is also important for your budget to consider the cost of the needed tools over hiring a professional. If the rate to hire is less than or equal to the cost of new tools, it may be worth it to leave the job to the pros.

Investing in the right tools will enhance the quality of your installation, reduce debris, and save you money. All of which every Do-It-Yourselfer is looking for.

Required Tools


Tool or supply

Purpose/Reason for Tool or Supply
Cabinet claw/clamps A cabinet clamp is a helpful tool that will hold the face frame together securely while you are assembling your cabinet. It also keeps everything in place while screws are installed.
Tape Measure A tape measure will be needed to identify several measurements for your installation including where the cabinets will be hung, openings for appliances, distances between structures, locations of outlets, etc.
Pencil A pencil will be needed to mark measurements taken while installing, and maybe to take notes as you go.
Printed Layout Print your Prime Cabinetry design, provided by our design team, for ease of installation. Having the layout to work from will ensure you remember exactly where each cabinet is meant to be installed while you are working.
Power Drill A power drill is commonly used for assembling cabinets, hanging cabinets, installing knobs and pulls on cabinet doors, etc.

Laser Level or standard 72” level
A level or laser level is a control tool that provides a reference for ensuring your cabinets are perfectly horizontal to the floor. This is needed for countertop installation to run smoothly as well.
Stud Finder As the name implies, this handheld device helps you locate the framing studs behind the drywall. It can also help you locate plumbing and electric lines in some cases so you avoid running into those.
Touch Up Kit/Putty A touch up kit can be purchased from Prime Cabinetry when you order your cabinets. It is used to cover any small dings that occur during assembly and install and nail holes.
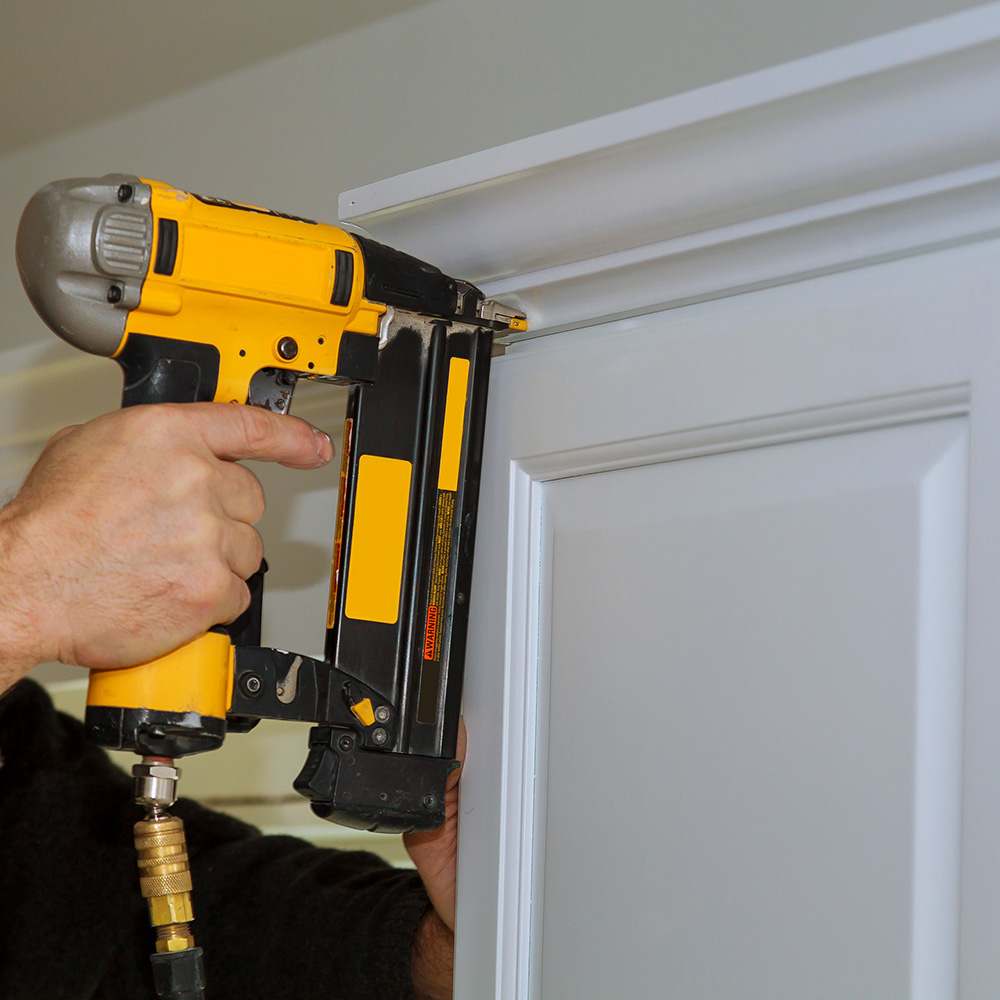
Trim Nailer A trim nailer is most often used to install crown molding, toe kick, scribe molding, light rail molding, base moldings, etc. You could use brads and a hammer but most installers would say this tool is a necessity for cabinet installation.
Miter Saw A miter saw is required to cut cabinet trim and crown molding at precise angles. It is also used to cut filler strips and some skin panels.
Wood Block A wood block is used for installing crown molding. When working with full overlay cabinets the ¼” reveal of the face frame is not enough for the crown to be nailed to. The wood block is installed first, then the crown is nailed to the block.
Table Saw A table saw is an electric woodworking tool with a circular blade mounted on an axel. The blade protrudes through the top of a table and provides support for the wood being cut.
Philips Screwdriver A screwdriver designed to to be used with a phillips-head screw. This type of screw has an X shaped top and is what we use most in our cabinet assembly.

Optional Tools

Tool or Supply Purpose/Reason for Tool or Supply
Jigsaw A jig saw is ideal for cutting curves and complex shapes into wood or drywall. For cabinet installation it is commonly used for cutting outlet and plumbing holes, modifying universal cabinets, making short crosscuts on a board, etc.
Cabinet Jack
A cabinet jack is made for holding upper cabinets in place while hanging. This is an ideal tool to have on hand if you are limited on manpower or are working alone. If you have a crew installing the cabinets one may not be needed.
Cabinet Hardware Jig A cabinet hardware jig is a great tool that helps you install your cabinet knobs or pulls to the doors perfectly every time. This tool is not required as there are other tricks out there to install your cabinet hardware but it is certainly useful.
Hearing Protection Avoid ear damage from saws and nailers. Noise reducing headphones or earplugs are nice to have because construction sites are always loud.
Shop Vac Anytime you are removing cabinets and sawing wood there is bound to be dust. A shop-vac is simply more durable for this type of use and with its five gallon size tends to clean debris best.
Wood Glue Wood glue is a great option for assembling your cabinets. However, it is not required for assembly because our cabinets are sold with the needed brackets and screws.
Staple Gun Staples and a staple gun is another great option for assembling your cabinets. However, it is also not required for assembly because our cabinets are sold with the needed brackets and screws.
Crown Moulding Jig A crown molding jig is used to simplify difficult inside and outside crown molding cuts. Angles are tough so this handy tool really helps you master mitered corners and other angles.
Multitool/Oscillating Tool A multitool is a power tool that oscillates allowing you to sand, saw, and cut different materials. It is helpful for a number of tasks with cabinet assembly and installation including trim cutting, grout removal, cabinet modifications, drywall cutouts, etc.
Shims Cabinet shims are slender pieces of wood, cut into a wedge shape, that are used as a solution for things like leveling base cabinets on an uneven floor or flushing side panels for decorative door application.

What is a Blind Corner Base Cabinet?

If you buy our unfinished or custom cabinets online and plan to install them yourself, you need to know how to handle the corners where two rows of cabinets meet. One option is to install a diagonal corner cabinet, such as a Lazy Susan, with a door in the corner. However, a more standard approach is to have the two rows meet at a 90 degree angle. With this approach, a blind corner base cabinet is installed such that a portion of the corner cabinet is hidden by the one adjacent to it. The hidden section provides storage without giving up space in a corner.

What is the Cabinet “Pull”?

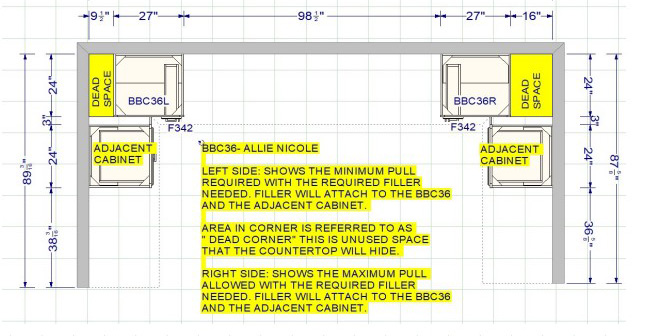
Blind base corner cabinet installation requires a minimum and maximum “pull.” You must “pull” the blind cabinet a certain number of inches from the wall to create proper clearance for the door and drawer to open without interfering with the adjacent cabinet.

Measure the pull distance from the wall to the opposite edge of the blind corner base. The number of inches left over between the wall and the cabinet is known as dead space. The need to pull a blind base cabinet from the wall is what makes it unique in how it functions, since no other cabinet type requires this.

Cabinet pull diagram

In addition, you usually need to add a 3” filler strip to join an adjacent cabinet to the blind corner base while leaving enough room for the doors and drawers to open properly. Without this filler, the doors and drawers that meet in the corner may be too close and will hit each other when opening.

Attach the filler to the stile of the blind corner cabinet. The stile is the vertical strip of wood that extends beyond the door and drawer in the direction of the open blind side.

In the aerial view below, you will see an example of a blind base cabinet installed and labeled with what is required for it to function properly. Here we have shown both the minimum and maximum pulls.

Blind cabinet layout.

Minimum vs Maximum Pull

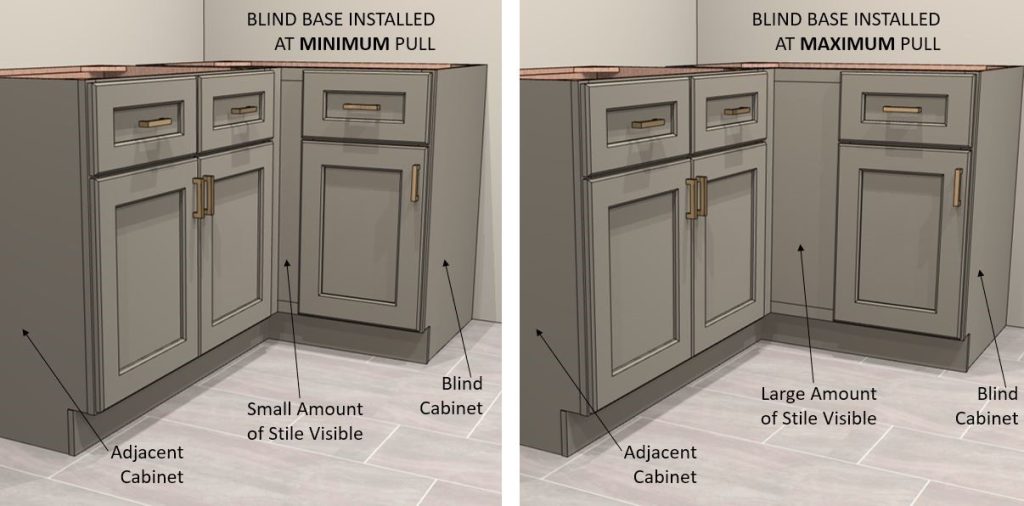
The amount of stile that is visible depends on how far the corner cabinet is pulled from the wall. See below a visual of how much stile will be seen based on the respective minimum and maximum pulls applied. If the blind base is installed at minimum pull, you will see less of the stile. Alternatively, if it is installed at maximum pull, you will see more of the stile.

Blind cabinet at minimum and maximum pull distance.

In the images below you will see examples of blind bases with built in clearance installed and what is required for them to function properly. Most blind base cabinets are not made this way, but it is possible to have them made to extend all the way to the wall to make maximum use of corner storage space. However, it may be hard to reach all the way into the corner.

Diagram of blind cabinet with filler strip.
Blind base cabinet installation layouts.
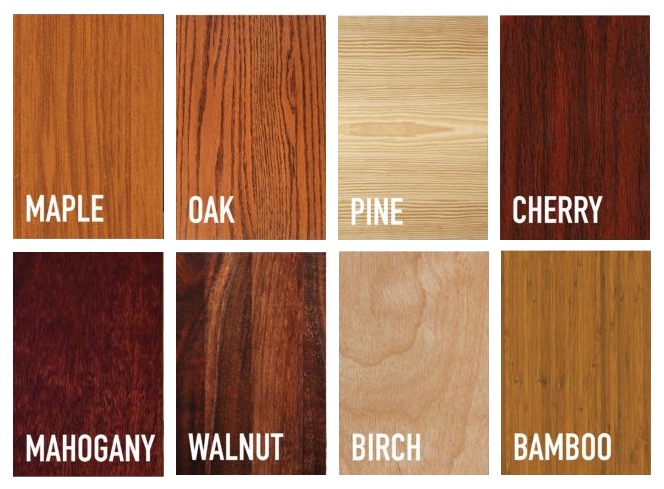
Types of wood for furniture.
This is a guide to help you decide what types of wood to choose for your cabinets, bookcases, or other furniture.

Maple

Maple is one of the hardest wood types for furniture or cabinetry. It’s often used for heavy-use items like dressers and dining sets, as it can take a beating. It is almost always used for painted kitchen cabinets since it does not have very pronounced grain, which can show through light-colored paints if you use other types of wood. If you want unfinished cabinets and plan to paint them, order Maple. It is also more affordable than many other hardwoods. This, combined with its durability, makes it ideal.

Maple is found primarily in the Great Lakes region. Its color ranges from cream to reddish-brown, but it takes dark stains especially well. So, maple wood can easily be stained to resemble more expensive wood like mahogany. Maple wood has a straight, fine grain with occasional bird’s-eye or fiddleback patterns. Hard maple usually has a lighter color while soft maple tends to be slightly darker.

Oak

Oak is a durable and long-lasting wood type. Because of the trees’ slow growth, the wood is extremely dense, adding to its quality. The wood adapts to a variety of finishes. This makes it ideal for both modern and traditional furniture. It’s also often used for Mission/Arts & Crafts furniture design.

Most oak lumber comes from the eastern and central United States. Many American antiques are constructed of oak wood. Oak furniture will last centuries with proper care. The color ranges from light brown to pinkish-red with a swirling or striped grain. Oak furniture is often known as a scratch- and stain-resistant wood, if properly finished.

Pine

Pine is popular with rustic and farmhouse design. It is a lightweight wood, making it great for families that move frequently. Pine is an inexpensive wood and is a good option for those who aren’t quite ready for the investment of other wood types. Pine paints well and painted pine furniture is often used for kids’ rooms because of the fun colors.

Pine is found throughout the Northern Hemisphere. Its color ranges from white to light brown with yellow or red tones, and it’s known for its beautiful knots. The knots are what add character and rustic charm to the finish. Pine wood furniture resists shrinking and swelling, maintaining its shape for years.

Cherry

Cherry wood is known for its extremely straight and uniform grain. The wood polishes well and has a beautiful finished look. Also known for its popularity use for antique furniture, cherry is last centuries with the proper care. It is considered a prized hardwood among craftsmen. Cherry wood furniture is often an investment that will pay off long-term.

Cherry is found in the eastern United States. Its distinctive color starts as a pinkish-brown and darkens to a deep red with a straight grain and some rippling. Like most wooden furniture pieces, cherry becomes more beautiful as it ages. Cherry is the best wood for furniture that’s designed to last for years and stay in your family.

Mahogany

Mahogany is a durable hardwood that’s often used for investment, intricate pieces of furniture. The wood species has a pleasingly fine, straight grain. Because of the trees’ large size, mahogany is produced in large boards. This makes it perfect for focal point furniture. Mahogany has a timeless look and adds warmth to the room. Any mahogany wood furniture will last generations with proper care.

Mahogany is native to Mexico, Central and South America, but it’s grown throughout the tropics and Africa. African mahogany has become more popular than South American mahogany. However, antique pieces are most often made of South American mahogany. Its color varies from pale to pink to reddish-brown with a straight grain. Mahogany is the best wood for furniture that is elegant and timeless, especially large pieces like dining tables.

Walnut

Walnut is a hard, strong and durable wood for furniture. It carves well and holds its shape for years. This makes it perfect for ornate furniture that requires a high level of craftsmanship. This wood is ideal for investment pieces and furniture you want to stay in your family for generations. Think Amish Heirloom furniture.

In North America, walnut grows from Vermont to the Great Plains and south through Louisiana and Texas. Its color varies from white to dark brown, and it’s known for its large burls. Common types include Brazilian walnut, Caribbean walnut, black walnut and North American walnut wood. Walnut’s grain is typically straight, but some waves appear closer to the roots. Walnut is the best wood for furniture that is ornate and requires a lot of detail.

Birch

Birch is an extremely strong and durable hardwood that grows abundantly in North America. The species’ beautiful appearance and blond color make it a great wood type for modern furniture. It has an elegant, clean-lines grain that complements simplistic interior design.

Birch grows in the Northeast and Great Lakes regions and along the Appalachians. Its color ranges from cream to light reddish-brown with a fine grain. The wood’s strong, durable nature makes it great for woodworking and detailed craftsmanship.

Bamboo

Bamboo is known for its eco-friendly nature and beautiful blond coloring. The species is actually a grass, rather than hardwood. Because of this, bamboo grows rapidly. It grows about 10-times faster than hardwoods do. Bamboo also resists swelling and shrinking.

Bamboo grows in every continent except Europe and Antarctica. Its color varies from very light to a warm medium tone, but naturally, it boasts a soft blonde color. Bamboo furniture is versatile for design but is most common in contemporary interior design. Bamboo is the best wood for furniture made for environmentally-conscious families and modern design.

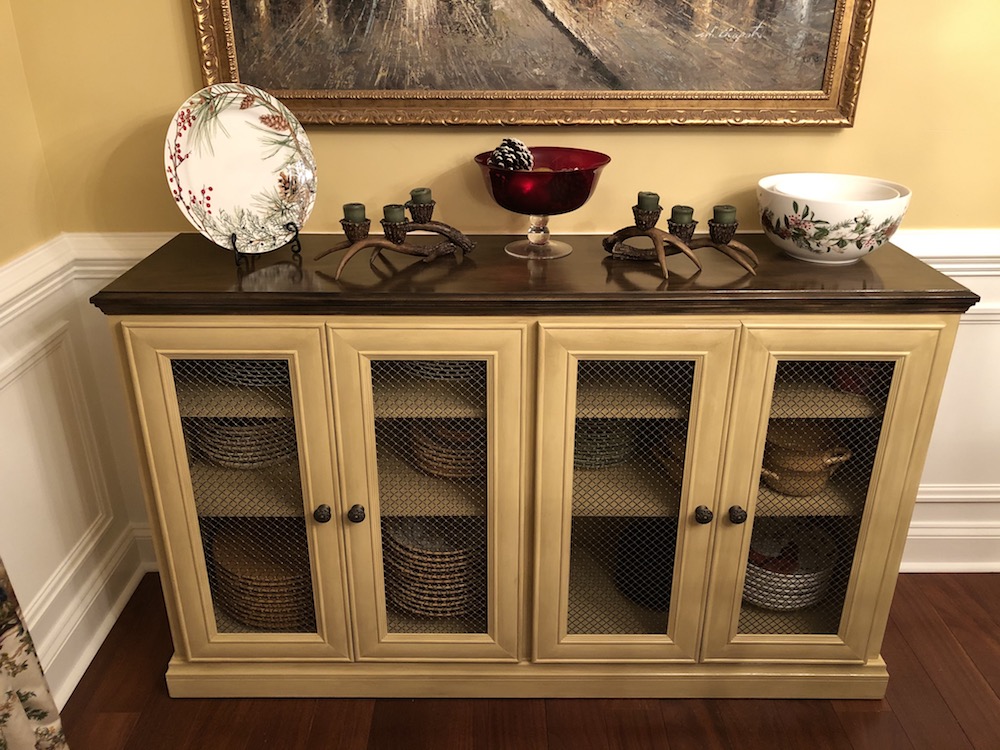
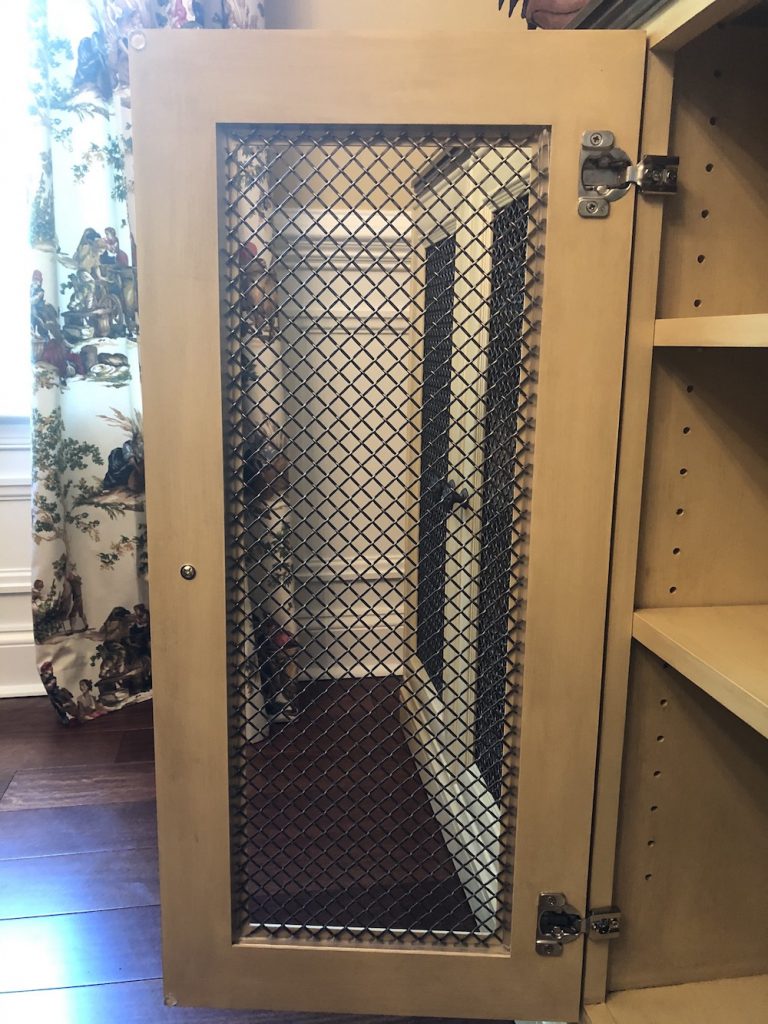
Many kitchens or wall units include glass doors for places where you may want to display your kitchenware, photos, or other objects, but don’t want them completely exposed. Bookcases can also have glass doors to cover electronic components without interfering with the infra-red remote control signal. An alternative is wire mesh, which allows you to see what is inside, but provides a more decorative appearance.

We added some custom doors to one of our Traditional bookcases by replacing the glass with oil-rubbed bronze wire mesh.

Bookcase with glass doors converted to wire mesh

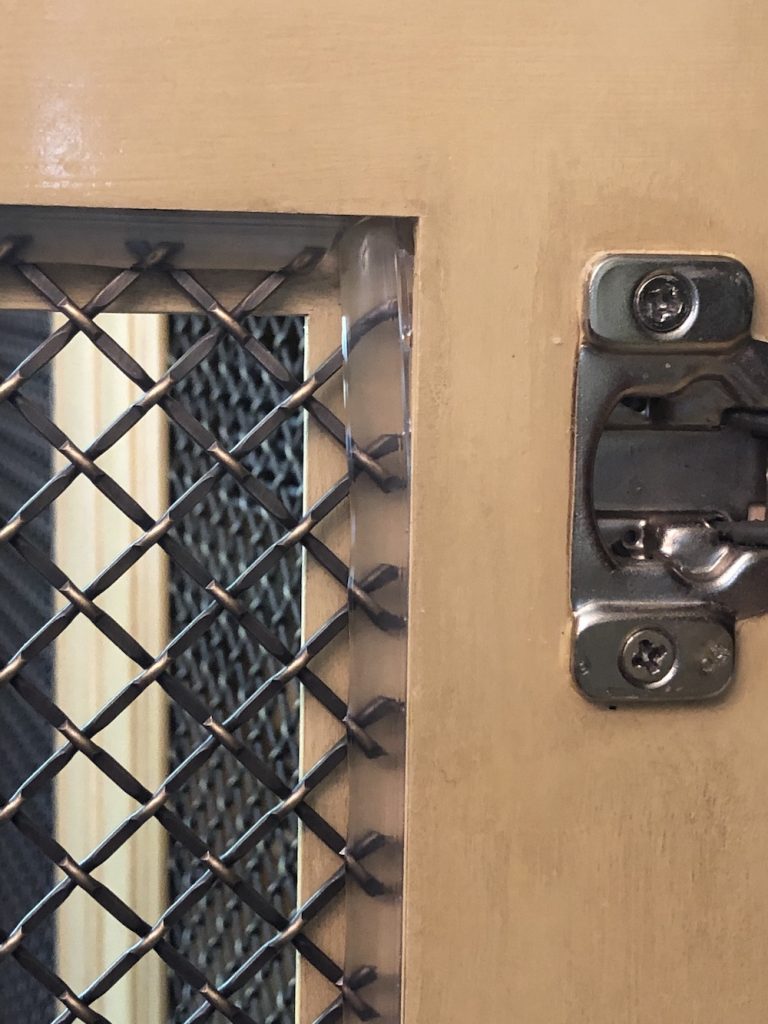
To install the mesh, the glass was first removed and replaced with a custom-cut piece of wire mesh. Most glass doors have clips that hold the glass panel in place, but we use plastic material that is inserted into a slot along the inside edge of the door frame. The plastic strip can hold either a glass panel or the wire mesh, or probably any other kind of thin panel.

Plastic strip used to hold panel in door frame (back view of door).

The wire mesh used in this piece is a 1/4″ thick round wire that has been crimped and has an opening size of 1/2″, which makes it fairly easy to see through without making it too open.

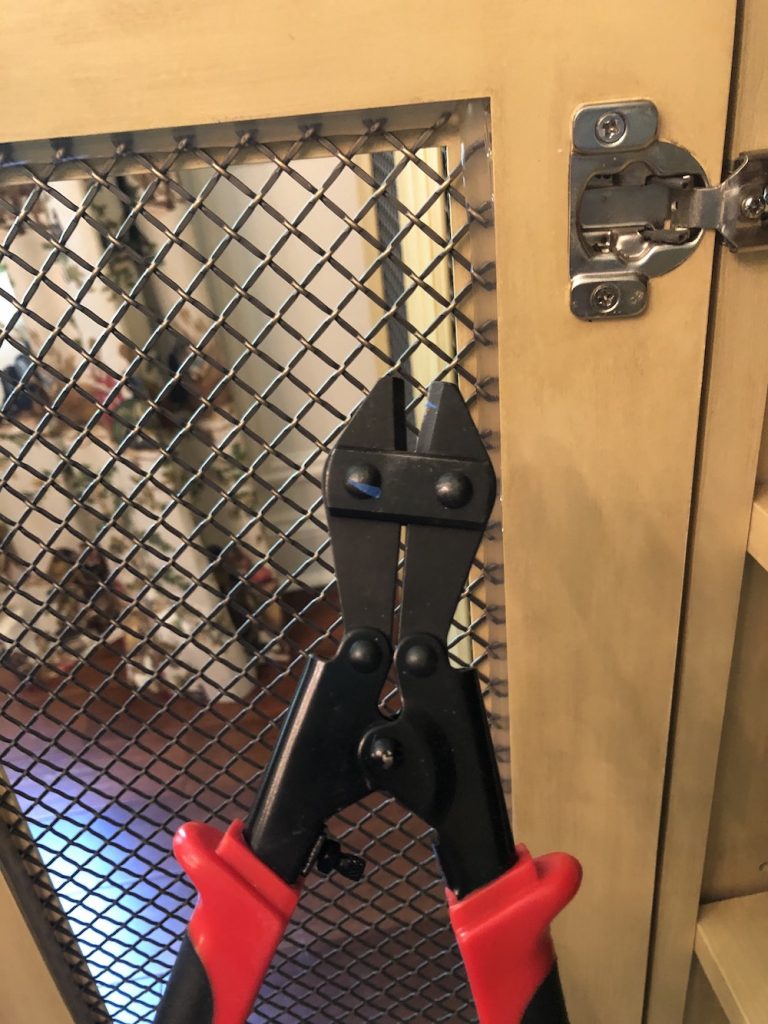
Wire mesh is generally sold in sheets that are at least 36″ x 48″, so you would need to cut it to fit your door openings with a good wire cutter.

Wire cutter to cut 1/4″ wire mesh.

Adding a good quality wire mesh to a door isn’t cheap, but it can dramatically enhance the look of your cabinets or bookcases!

Crown Moulding
Crown Moulding

Crown Molding Basics

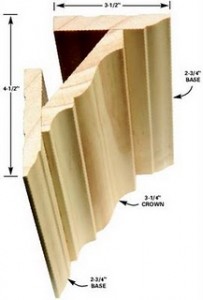
Crown molding is a decorative trim piece the sits on an angle, and is used to cover transitions between walls, bookcases or cabinets and the ceiling for decoration. It can be installed where the walls and the ceilings meet, but it can also be used to fill the gap between the top of a bookcase or cabinet and the ceiling, or sticking up at the top of a row of wall cabinets or tall bookcases. They can either be plain or sprung.

Most of today’s interior designers agree that every room benefits from the use of crown molding treatment. It is one of most important architectural elements used to define interior spaces. Moulding is typically made from solid milled wood or plaster but may be made from plastic or reformed wood. Installing crown molding to a room, or to the top of your cabinets or bookcases, instantly adds an aesthetically pleasing and classy look.

Varieties of common moldings include:

  • Crown
  • Cove
  • Astra-gal
  • Bead molding
  • Bed molding
  • Dentil
  • Scotia

The installation of molding improves the transition from wall to ceiling or bookcase to ceiling and defines the architectural style of a room. The size and style of crown molding used may vary widely, from a simple coves in a farmhouse kitchen to large built-up cornice in a grand entryways.

The size and style of molding used may vary widely, from a simple coves in a farmhouse kitchen to open top crown with rope lighting to large built-up cornice in a grand entryways.

Installing Crown

Installing crown moulding

Crown moulding, also known as ceiling trim, gives a wall depth and character. It’s a budget-friendly way to update the look of most any room. You can also use crown moulding to accent the style of your pantry or kitchen cabinets. Read on for the basic steps and tips on how to install crown moulding.

Plan Your Installation

Measuring for crown moulding

Learning how to install crown moulding starts with careful planning. The moulding pieces need to fit seamlessly around your room. The first thing to do is determine which crown moulding to use. There are a number of different decorative styles that you can install based on the decor of your room. You can also opt for cove moulding if you are interested in a look that is not as fancy but still neatly finished. 

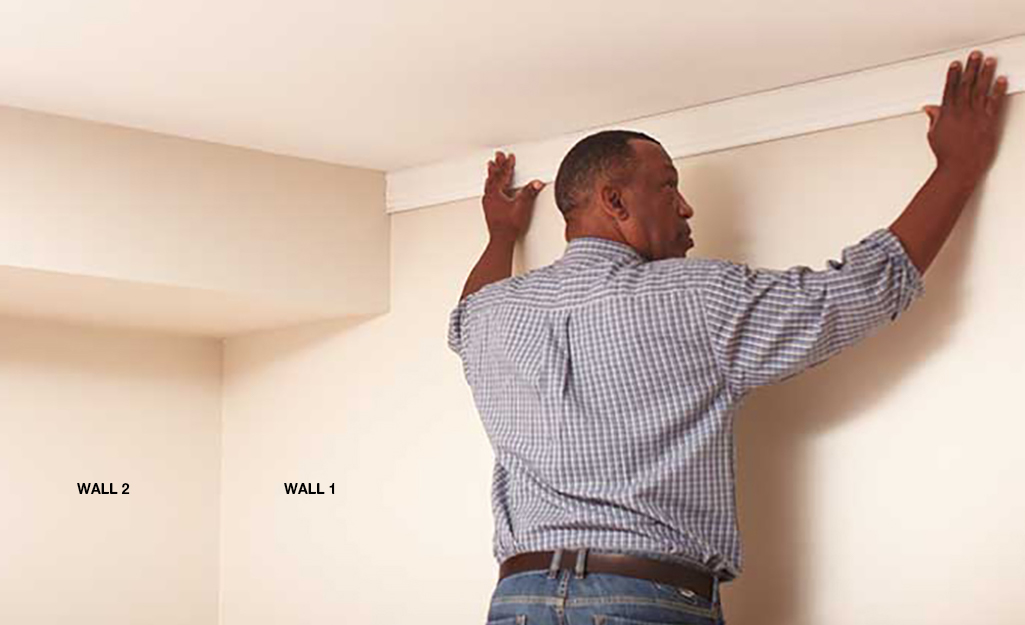
  • Start your planning on the wall opposite the door (wall 1 in photo above). You want the first view of your crown moulding to be the best.
  • Plan your way around the room. The moulding on wall 2 in the photo above will be coped, or cut to shape, where it meets the moulding on wall 1.
  • The third wall is treated the same way as wall 2. The fourth wall is coped at both ends.

Measure the Room and Mark Studs

Marking Studs

Each piece of crown moulding will need to be custom fitted to your wall and each other. No room is perfectly square, so measuring accurately is essential. You’ll also want to nail the crown moulding into a stud for a secure hang. 

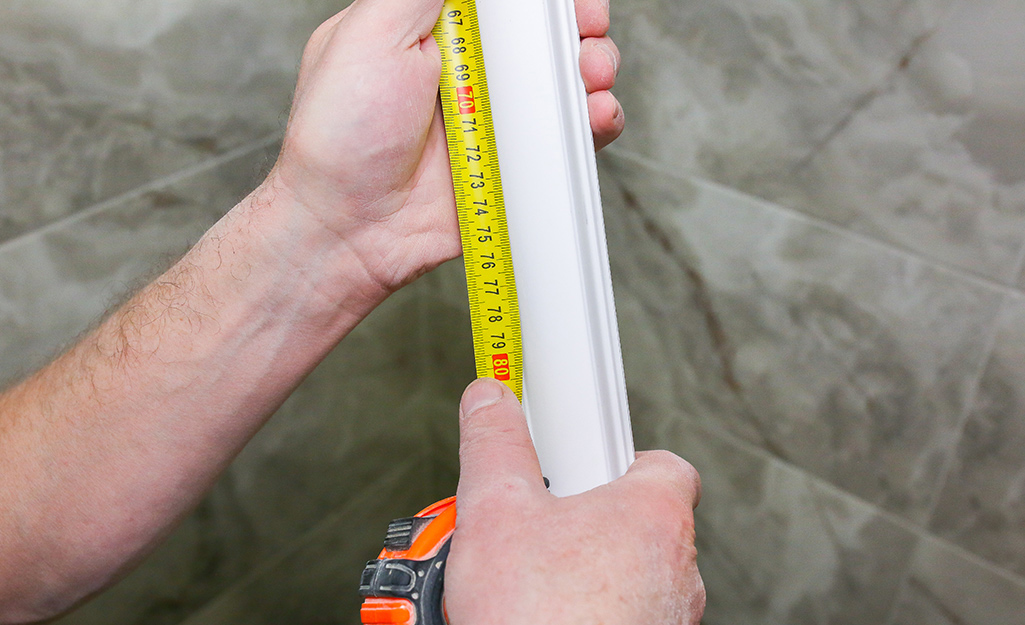
  • Measure the wall from corner to corner. Draw a faint line where the bottom of the crown moulding will lay. This will help you keep the moulding straight. Write your measurement down to use when cutting your crown moulding.
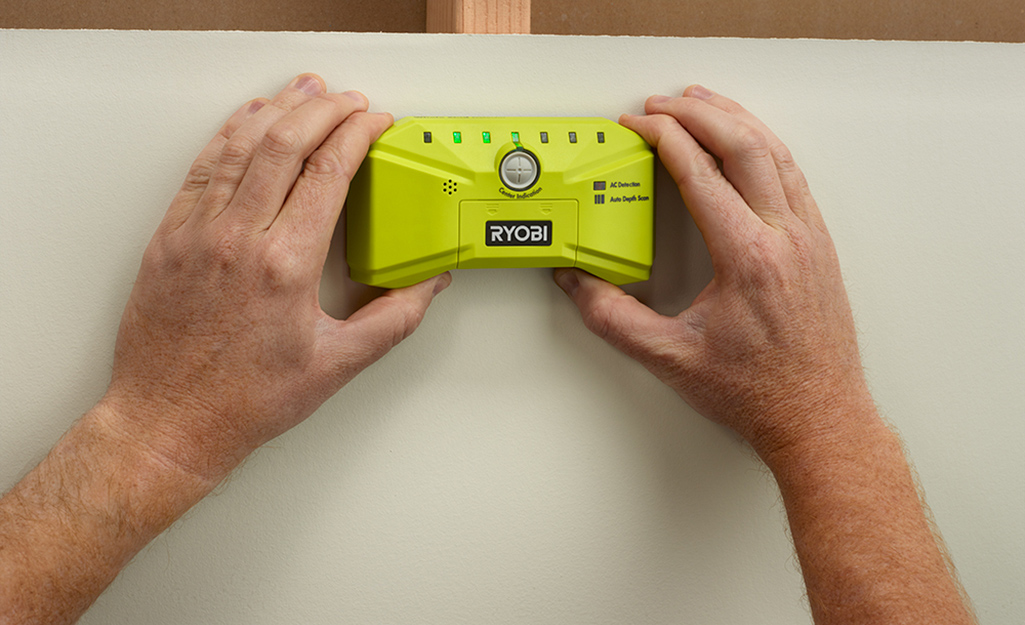
  • Use a stud finder to locate the studs. Make faint pencil marks high on the wall to guide you as you nail.

Measure and Mark Moulding

Measure and mark moulding
  • Put the moulding against a framing square, noting the distance between the face of the moulding edge and the corner.
  • Cut a scrap of lumber to the correct dimension and draw layout lines on the wall and ceiling.
  • When you install the moulding, align it with the layout lines.
  • Begin placing moulding against the wall opposite the door.
  • Mark the locations of the studs by holding the moulding in place. Transfer the stud marks onto the moulding.

Set up the Miter Saw

Set up the miter saw
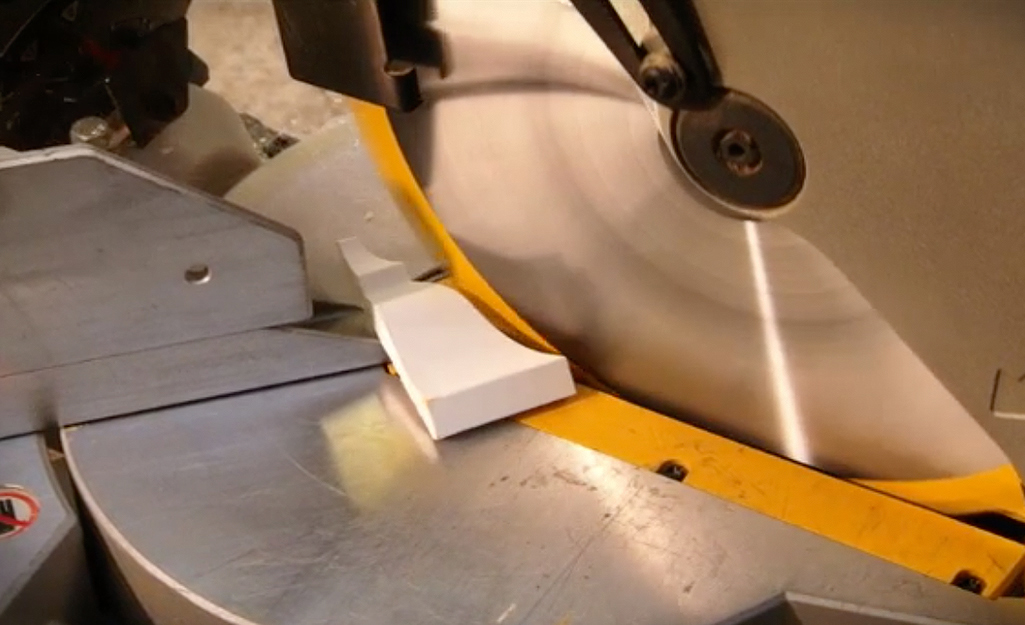
  • When first learning how to cut crown moulding, position the moulding correctly on the saw.
  • Set the miter saw to cut at 45 degrees in the general direction of the angle you need. See Step 5 below.
  • Make sure the ceiling edge is flat on the bottom of the miter box. The wall edge should be tight against the fence.
  • If the blade and cut line won’t align, try turning the moulding upside down and try again.
  • Cut close to the end.

Tip: If you do not have a miter saw, cuts can be made with a hand saw and miter box.

Cut Crown Moulding

Cut crown moulding

Part of learning how to install crown moulding is figuring out which cut to use. You will make inside corner cuts, outside corner cuts and sometimes scarf joint cuts. The most common types of crown moulding cuts are:

  • Inside corner cuts have a long bottom edge and a short top edge. The cut on the left will angle left. The cut on the right will angle right.
  • Outside corner cuts have a short bottom edge and a long top. The cut on the right will angle left. The cut on the left will angle right.
  • Scarf cuts are used to join two pieces of moulding that meet on a wall. The cut will angle in the same direction on both sides of the moulding.

How you cut your crown moulding also depends on what kind of joints will work best. There are two kinds of joints: mitered and coped. Mitered joints meet at the corners in a perfect 90 degree angle. Coped joints work best when a corner isn’t squaring up or is not at 90 degrees. 

A coped joint is when you cut the end of the moulding square and install it flush into the corner of a wall. You then cut the next piece of moulding to fit the profile of the first. Most corners are not perfect, so it’s good to know how to make a coped joint.

  • Lay out the cope joint on a second piece of moulding. Start with a piece that’s a few inches longer than the finished length. Flex it in place.
  • At the end of the moulding that you will cope, draw a line in the general direction you plan to cut. Cut at roughly a 45-degree angle.

Tip: Cut the inside corner and outside corner moulding upside down on the saw. Place the ceiling side on the bottom and the wall side on the top.

Test and Trim to Fit

Test and trim to fit

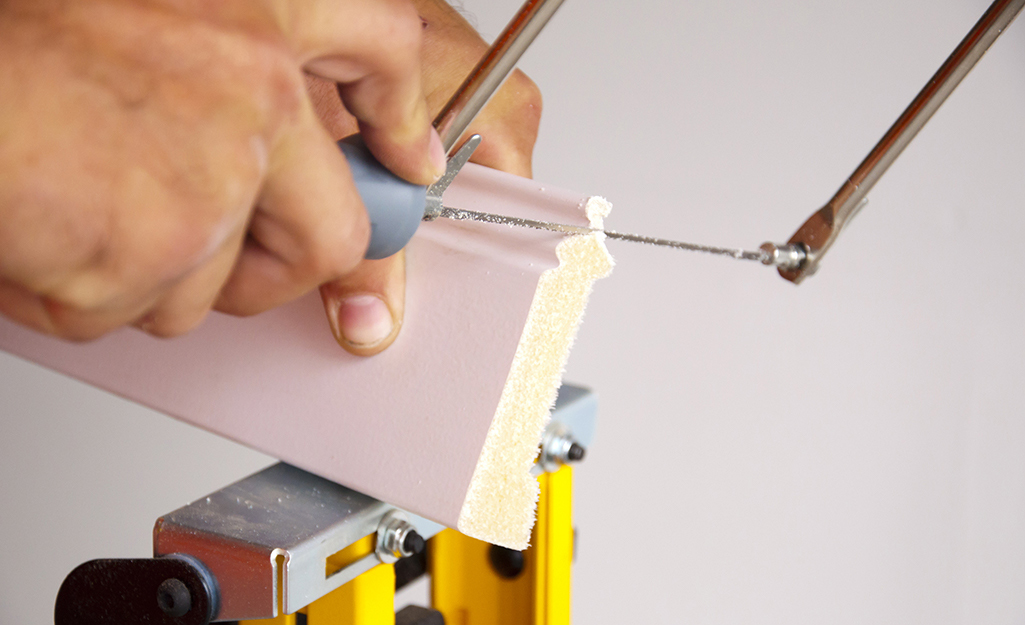
You want your cuts to fit snugly together. As you cut each piece of moulding, look closely at each one. See if there is the excess wood beneath the profile. Cut away any excess with a coping saw. 

  • Tilt the coping saw back at a 45-degree angle to create a razor-thin edge where the two mouldings will meet. You want the mouldings to overlap flat.
  • Check the joint by fitting it against a cutoff.
  • Be prepared for an imperfect fit. Fine-tune the joint until it fits.
  • Sand and file any high spots to create a tight fit.

Installing Crown Moulding

Installing crown moulding

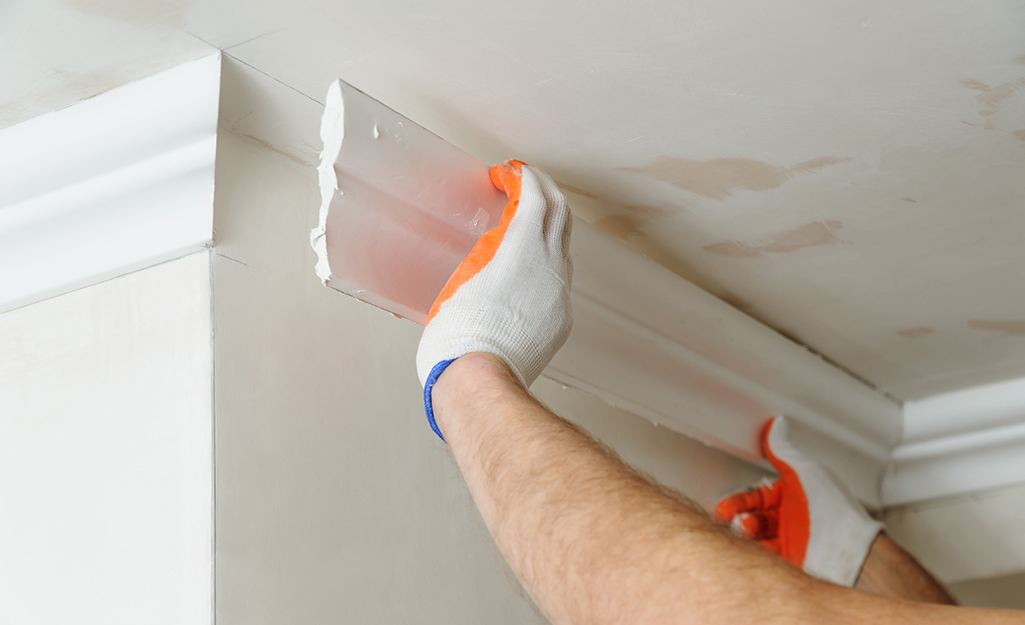
Once you’re sure the joints fit, you’re ready to install the crown moulding.

  • Measure the wall again.
  • Cut the moulding 1/8-inch longer than measured. The extra length will help push the cope joint closed when installing crown moulding.
  • Make a square cut on the uncoped end of the crown moulding.
  • Flex the moulding in place.
  • Nail or glue the moulding to the wall and ceiling. To prevent splitting, drill pilot holes the diameter of the finishing nails. Drill holes at each mark at the top and bottom of the moulding and nail in place.
  • Putty any nail holes.

Crown Moulding Installation Tips

Crown moulding installation tips
  • Purchase a few extra feet of your crown moulding to make practice cuts.
  • Before you install it, prime and paint the sides and back of the moulding. This will keep your moulding from warping. You can use stain or varnish instead of paint.
  • Wear appropriate hearing and eye protection when cutting your moulding.
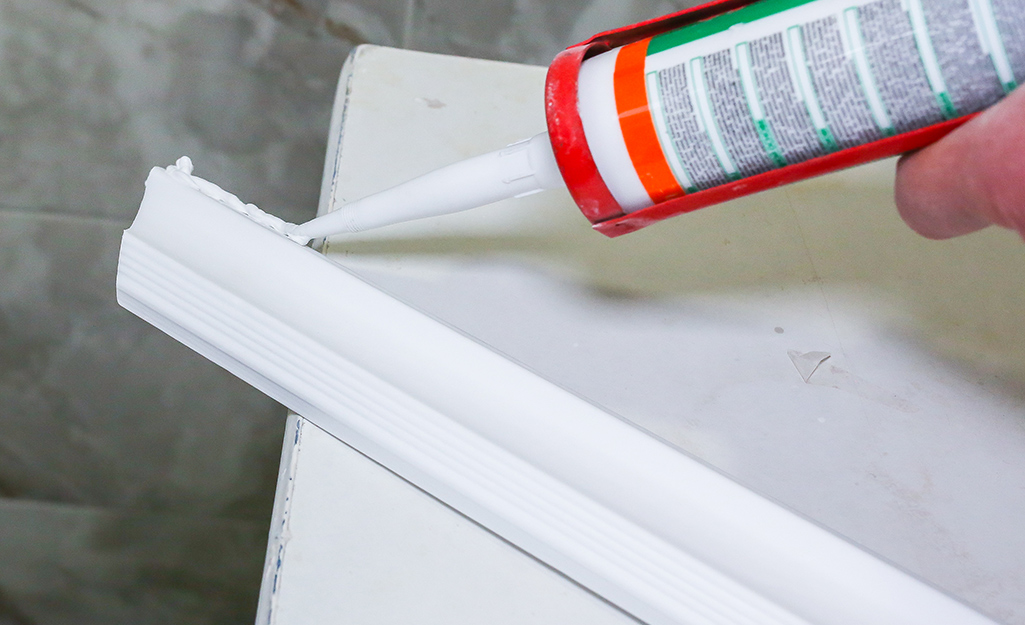
  • If you’re painting the moulding after installation, run a bead of caulk in the seam. Wipe it smooth with a wet finger or damp rag.
  • Don’t guesstimate, calculate. Know exactly how much you need with our project calculators.

Now that you know how to install crown moulding, you can improve the look of any wall. Try out different ideas: Use crown moulding to create a picture frame or to border a built-in bookshelf. Use a few different types of moulding together. Different combinations of moulding are called build-ups. Learning how to install crown moulding means you can install build-ups the same way. 

Remember to measure and cut accurately for the best look. And don’t worry if you don’t own all of the tools needed to complete this DIY crown moulding project. Rent tools for any project at The Home Depot.

By Scott Murfey, Dec. 19, 2014

Remodeling Trends

Remodeling Trends

As we close out another year, many of us look forward to the rejuvenated possibilities and fresh starts that a new year presents to us. One way that new opportunity might manifest itself is in giving some part of your house a make-over. In fact, according to the National Association of Home Builders, home remodeling is at an all-time high, and it’s anticipated that it will only continue to grow in 2015. Here are ten of the home remodeling trends that we anticipate to see a lot of in the coming year:

1. Cabinets: The trend here is definitely fresh and simple cabinets with a modern look and feel. As a more affordable option, some people are refinishing their existing cabinetry to try and achieve that updated feel.

2. Countertops: While beautiful and durable granite is still a favorite, there is another strong, nonporous material called Caesarstone that is quite popular. Caesarstone is a quartz composite (93% quartz) that is resistant to stains, scratches and heat, and also doesn’t need sealing. In comes in a wide variety of colors, uses recycled material, and is easy to clean.

3. Backsplashes: When using granite or Caesarstone countertops, a natural stone or tile mosaic backsplash is an excellent compliment. They add texture and an extra visual component. Many of the more modern kitchens are using a glass backsplash to finish off a clean, polished look.

4. Sinks: The most popular current trend in sinks right now is the deep, single bowl. While the single-bowl size is large enough to accommodate pots and pans, people are utilizing fitted strainers and dish drains to maintain the benefit of a double sink. As for materials, stainless and quartz composites are popular for the bowl, while satin nickel is still most popular for the fixtures.

5. Color: To create the sophisticated modern look in the kitchen that works well with the natural stone of countertops and backsplashes, we are seeing a lot of charcoal shades, along with black and white.

6. Bathrooms: This next year will see many people knocking down walls and expanding their bathrooms to create that luxurious spa environment. It will continue to be popular to either rip out the tub to build a large walk-in shower or create separate tub and shower areas altogether. Other popular upgrades include double vanities and separate water closets.

7. Flooring: Pre-finished wood flooring is a popular trend as it offers a durable finish, easy installation, and come in a variety of colors, designs and textures.

8. Universal Design: The idea of universal design is to create a home that is customized to accommodate everyone living in it. This includes kitchen and bath upgrades to increase functionality and in general, knocking down walls to create a roomier, open, communal living space.

9. Green homes: 2015 will continue to see homeowners opting for a living space that is free of toxins and chemicals. Additionally, people are also becoming more and more energy-conscious which is reflected in the move towards energy-efficient appliances, materials, and designs.

10. Outdoor space: Not only are we seeing all of the above upgrades and additions to the houses themselves, but this next year will continue to see a growing focus on the outdoor space. This includes outdoor fireplaces, livable-screened porches, and luxurious eating and socializing areas.

These are just a few of the trends that we anticipate seeing continue and expanding into 2015.

by

Kitchen Remodeling Trends Intro

Does your kitchen need an upgrade? Are you looking to remodel part of your home to increase its resale value? Good news, homeowners, you will probably recoup 74-83 percent of the cost when you upgrade your kitchen.

According to the annual cost versus value report for home remodeling found that a kitchen upgrade costs an average of $18,856 to $54,909; however, you can recover up to $40,000. Plus, in the past year, the value of a kitchen remodel increased by 7 percent, translates to an additional $2,000 return on investment for homeowners.

All of this data points to one conclusion: whether you’re making minor upgrades or breaking out the sledgehammer for a complete overhaul, 2014 is a great year to remodel your kitchen.

We asked 25 top kitchen designers in America what are the most common trends they noticed in kitchen remodeling for 2014 and compiled this guide. Below you’ll find the most popular responses in each category.

Sink Trends in 2014

The kitchen sink gets a bad rap; people associate it with germs and dirty dishes, but it has quickly become one of the most popular upgrades when homeowners start remodeling. In 2014, stainless steel is out, non-traditional materials are in.

A beautiful, trendy kitchen sink not only complements a well-designed kitchen, but is also the foundation of function for cooks — everything from preparation to clean-up happens at the sink. A good sink has counter space on both sides, so the drying assembly line has ample room to work.

The following trending sinks fit different people with different tastes and lifestyles. One (or even a few) of these sink trends could inspire your next remodel!

Single-basin Sinks
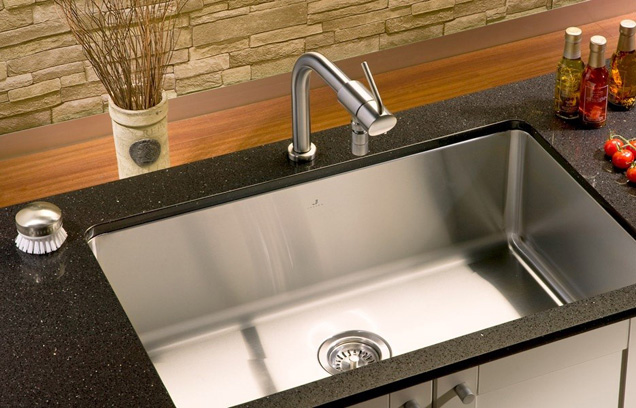
Single Basin Sink

Many home cooks are ditching the standard two-basin sink for something more functional — the single basin sink. These sinks are typically the same size as a sink with two basins, which means there’s more cleaning room. You’ll now have the space shuck corn, clean the catch of the day, and wash berries to create the perfect summer meal.

Copper and Brass Sinks
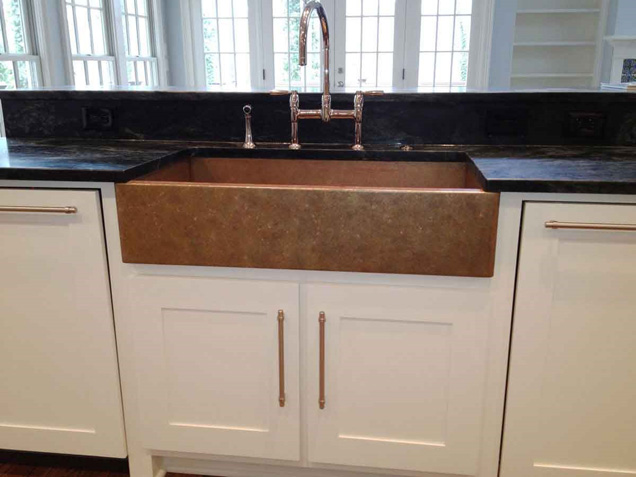
Copper/Brass Apron Sink

If stainless steel isn’t in style, what is? More homeowners are opting for copper or brass kitchen sinks. Often, this trend pairs well with the rustic farmhouse look that many homebuilders and trend-setters are opting for.

The different color of copper makes it a popular choice. You can choose a sink that looks like a new penny, or opt for a dark, antique color. For a minor remodel, leave your current sink, but change the faucets to a complementary brass color.

Integrated Sinks
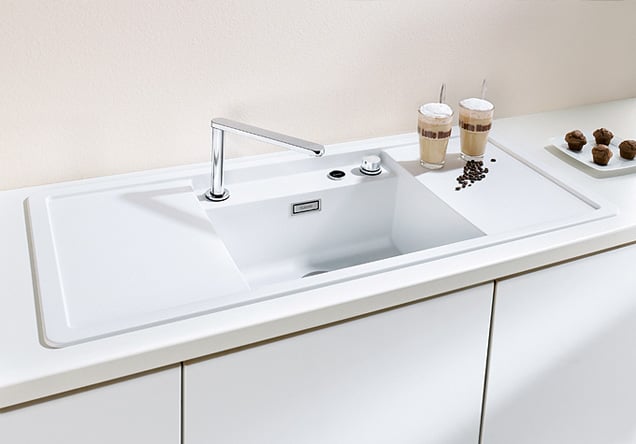
Integrated Kitchen Sink

An integrated sink is made of the same materials found on your countertop, giving a sense of continuity with the rest of your counter. This design is a great option for homeowners who want to replace their countertops as well as their sink, and want a smooth, unified look. This also gives the homeowner flexibility with materials, allowing them to select from quartz, marble, and everything in between.

For those who love a modern, sleek look in their kitchen, choose an integrated sink. It makes your kitchen look high-end, but the cost won’t reflect that. Because this seamless design doesn’t create dips or crevices between the sink and the counter, there’s less room for gunk, dirt, rust, or mold to build up around the sink.

Prep Sinks

Stainless Steel Island Prep Sink

If one sink is good, two must be great! Prep sinks are becoming an increasingly popular choice. A prep sink offers more flexibility and space to budding chefs who can leave washed fruits and vegetables in it – conveniently near the stove – while dirty dishes rest in the main one.

Prep sinks also allow designers to get creative with sizes and shapes. Many people opt for a non-traditional shape, like a crescent or oval, for their prep sink; it’s a small, creative touch that all of your neighbors will be jealous of.

Apron-front Sinks
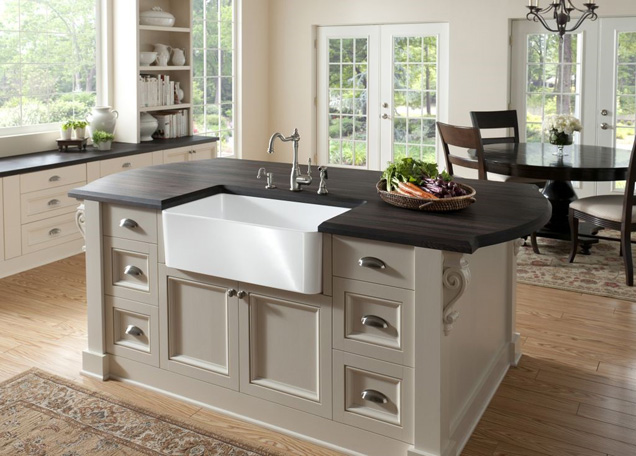
White Apron Front Sink

For a quaint finish to a charming kitchen, choose an apron-front sink. These sinks harken back to a quieter time. They’re sometimes described as farmhouse sinks as well. The basins sit lower than the counter and the front ends protrude off the cabinetry. The lower level makes it easier to clean and prep in the kitchen, because you can get closer to the sink. This country-style sink combines aesthetics and functionality. Look for it in classic materials like porcelain, stainless steel, and copper.

Countertop Trends in 2014

If one of the increasingly popular sink trends is integration with the countertops, then choosing the right material is twice as important. Skip the tile and go right for the meat: heavy stones like granite, marble, and soapstone are en vogue this year.

Creative Stone Choices
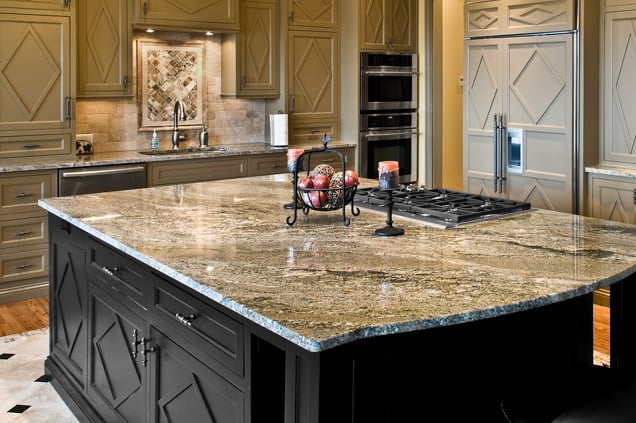
Engineered Stone Countertop

Decorators have started branching out into different stone types to work with the budgets and style preferences of home remodelers. While quartz and soapstone provide clean finishes, engineered stone is stain resistant, durable, and environmentally friendly. If you’re not afraid of heavy lifting, choose a heavy stone to set your countertops.

Stainless Steel Countertops
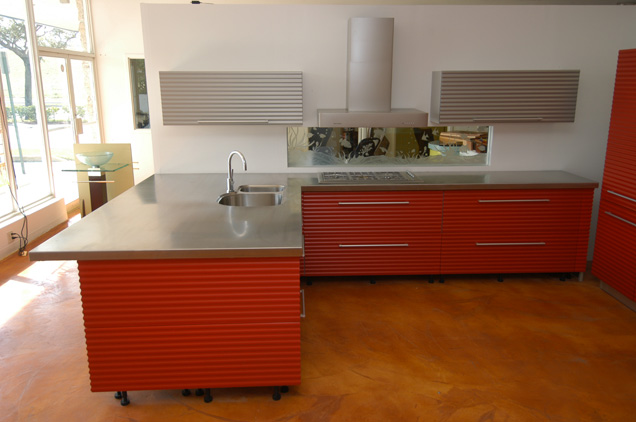
Stainless Steel Countertop

Stainless steel sinks by themselves are out, but integrated stainless steel sinks and countertops give your home a restaurant feel. These are one of the most durable countertop options, even though they can scratch and dent under pressure, and the reflection makes your kitchen appear larger. Choose this option if you’re looking to remodel your kitchen to sell your home; it’ll look large and modern, which is exactly what homebuyers look for.

Butcher Block Countertops
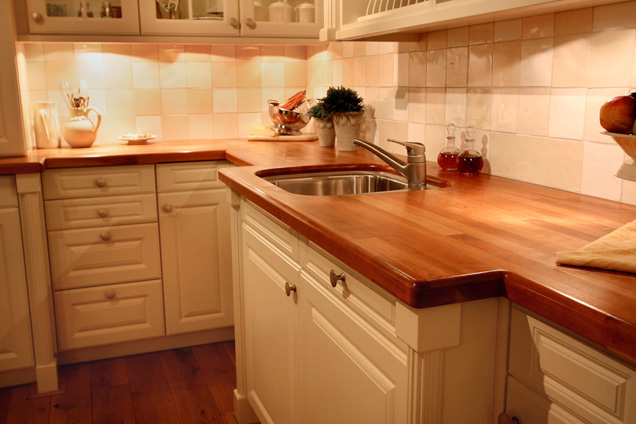
Butcher's Block Countertop
If you don’t want to go with granite and other heavy stones, another popular trend is Butcher’s wood. Butcher block is made of straight cuts of wood that are glued together for increased sturdiness. While these countertops require more maintenance than granite, they can be made to match or compliment your hardwood floors. They also come in a variety of wood including cherry, maple, and bamboo.

Flooring Trends in 2014

Wood is always in, and it’s the second most popular kitchen flooring choice after ceramic tile. In 2014, many designers are watching this material gun for first.

Obscure Wood Choices
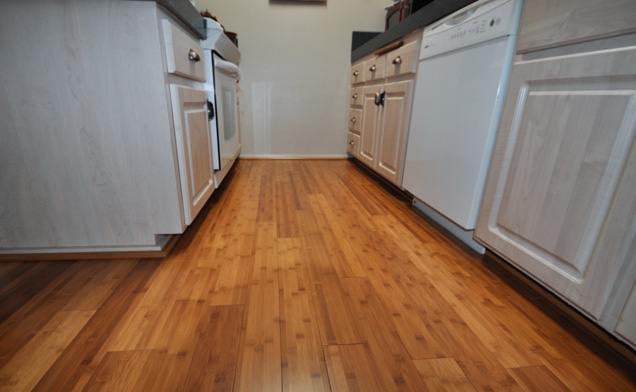
Bamboo Kitchen Floor

Two of the fastest growing wood choices for kitchen flooring in 2014 are bamboo and reclaimed wood. Bamboo is actually sturdier than most woods, especially engineered bamboo, and it grows twice as fast as most other wood options. Reclaimed wood comes from antique beams and old logs salvaged from rivers. With more designers opting for a rustic feel, it makes sense that this flooring choice is popular.

Wider and Longer Planks
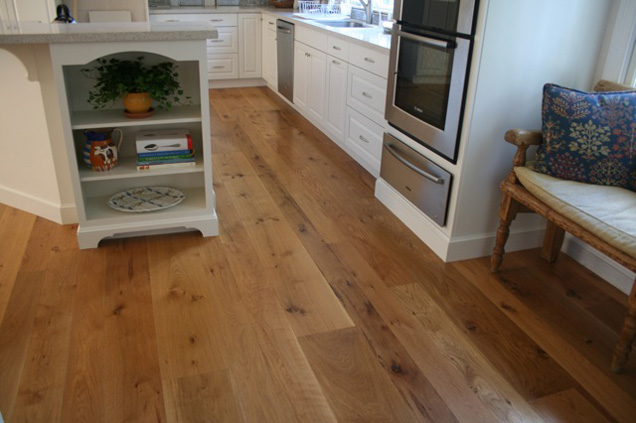
Wide Plank Kitchen Floor

Ideal plank length is seven inches with an ideal width of six feet. Wider and longer planks of wood make a space look larger and smoother. Smooth wooden floors paired with flat (tile-free) countertops are one way to give your kitchen a finished look by just changing two elements.

Increased Color Variation
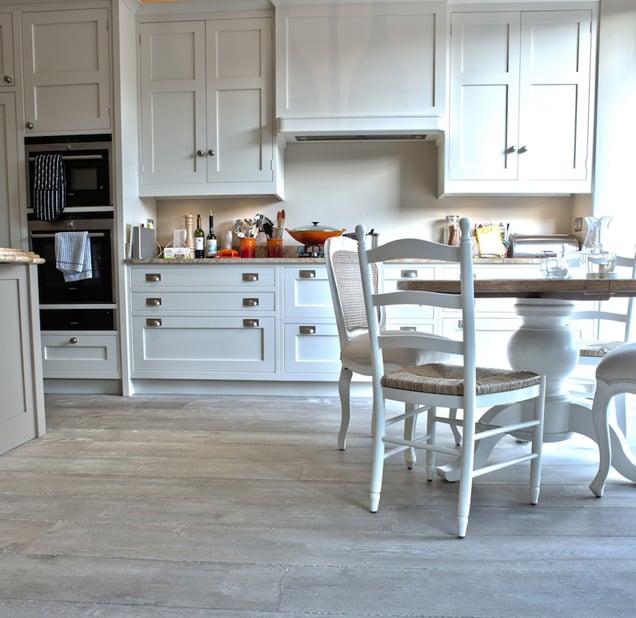
Gray Wood Kitchen Floor

You can use your hardwood flooring to anchor down your kitchen or lighten the room to contrast dark countertops. Different wood choices – from bright blonde woods to soft greys – turn your flooring into a statement piece. Hardwood floors aren’t something to be ignored; they’re a feature element.

Backsplash Trends in 2014

Backsplashes go in and out of style faster than other kitchen trends, but with a little elbow grease, it’s possible to stay up-to date on trends without breaking your bank. Check out these trends for 2014.

Rustic Brick Backsplashes
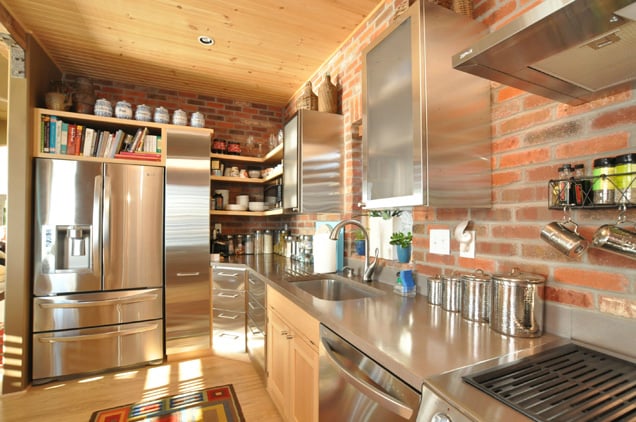
Rustic Brick Kitchen Backsplash

If you haven’t picked up on this trend already, the rustic farmhouse look is back with reclaimed wood and copper sinks. To add this element to your backsplashes, choose the rustic brick look. Brick is a challenge to install but will stay in style for several years. When done right, guests will ask if it’s the original brick from the building, even if you have a stucco home.

Use Tile Here
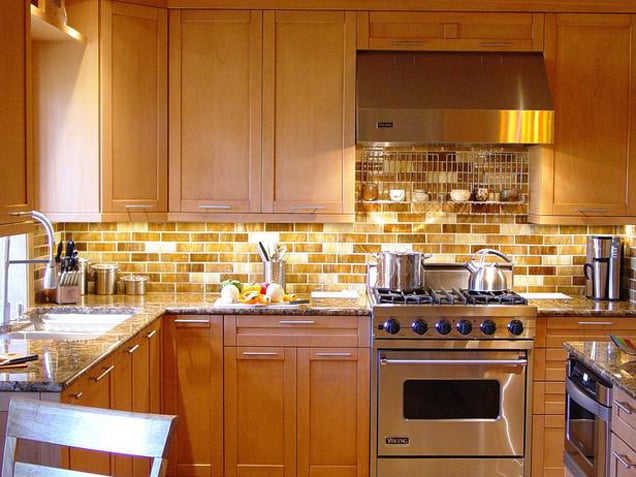
Tile Kitchen Backsplash

If you still want to incorporate tile into your kitchen without using it on the countertops or floor, then consider tiling your backsplash. This small space increases your options for size and color as you can create a water look with tiny blue squares or add an element of sand with large tan planks. Whatever element you’re missing in your major renovations, you can find in your backsplash.

Match the Countertops
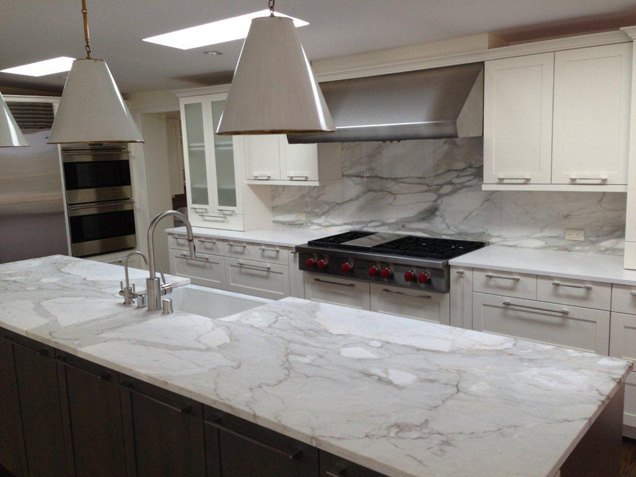
Kitchen With Matching Backsplash and Countertop

Be careful with this. If you have an incorporated sink that matches your countertops and you continue using marble or engineered stone for your backsplash, everything could start to blend together. Matching the backsplash to the countertops works well if there are enough differentiating elements – like the cabinets, stove, and flooring – to give each element its own flavor.

Kitchen Technology Trends in 2014

There’s an app for that! Chefs and tech geeks are coming together to incorporate smart technology into the kitchen. While many of the innovations are far from ready for public distribution, there are a few upgrades that can easily increase the value of your home.

Wi-Fi Enabled Refrigerators
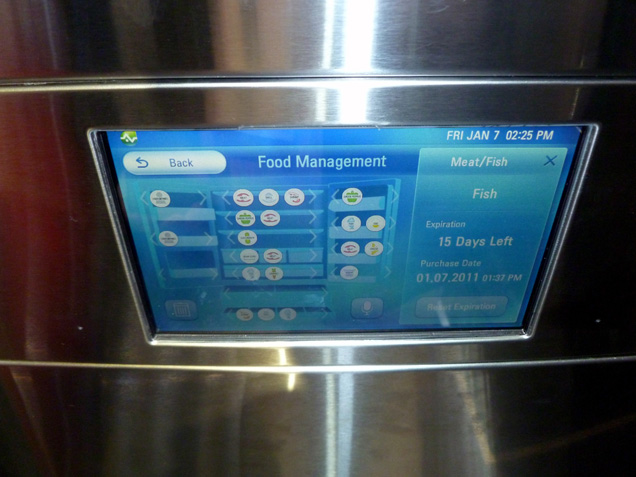
Wi-Fi Enabled Refrigerator
Image courtesy of en.wikipedia.org

There’s so much your refrigerator can do before you even open it. Smart refrigerators cost between $1,700 and $3,600; they come with an 8-inch LCD display that’s Wi-Fi enabled and comes with its own set of apps. These refrigerators can display photos, leave memos, create grocery lists, check the weather, and browse recipes based on the contents inside. Not only is it a fun tool to play with, but it also reduces the clutter of attaching memos and lists to your refrigerator.

USB Wall Sockets
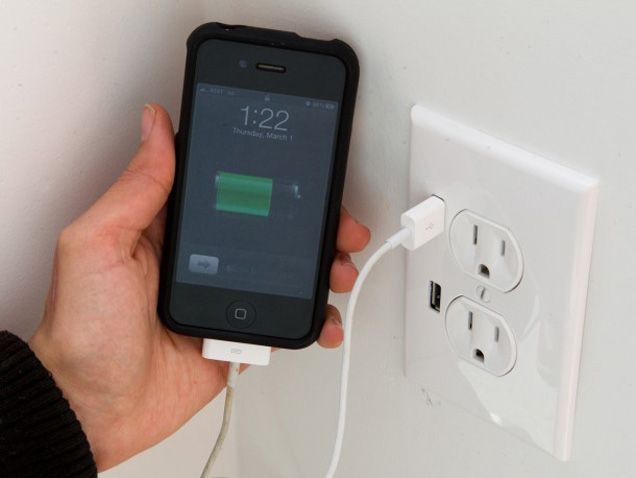
USB Wall Socket Charger

Homeowners looking to make small changes to upgrade the value of their home before placing it on the market should consider upgrading to USB wall sockets. Each socket costs about $30 and comes with two USB ports along with traditional wall plugs. Anything that charges when plugged in through a USB can go right into the wall; no adapter necessary.

Prep Pad
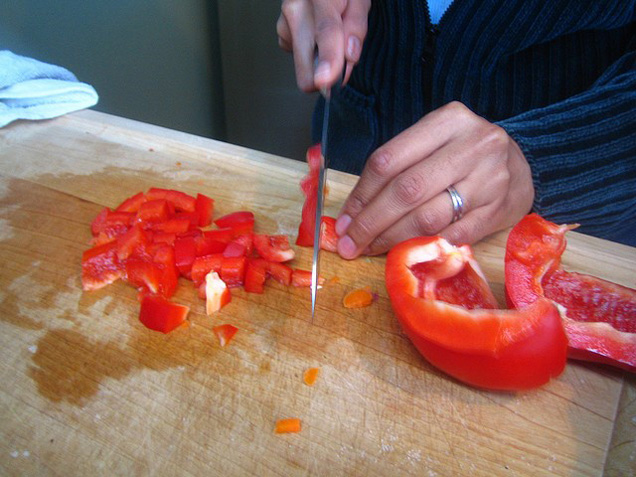
Wooden Prep Pad

This is a smaller device that costs about $150, although it’s more of a gadget than an “upgrade” in the strictest sense of the word. The Prep Pad measures the appropriate serving size for the food and displays nutritional value and percent of your daily diet on your iPad. In layman’s terms, it’s a smart cutting board.

Kitchen Eco-Friendly Trends in 2014

Going green is always in style. Here are a few modern ways to decrease your impact on the environment through your kitchen remodel decisions.

Eco-Friendly Paint
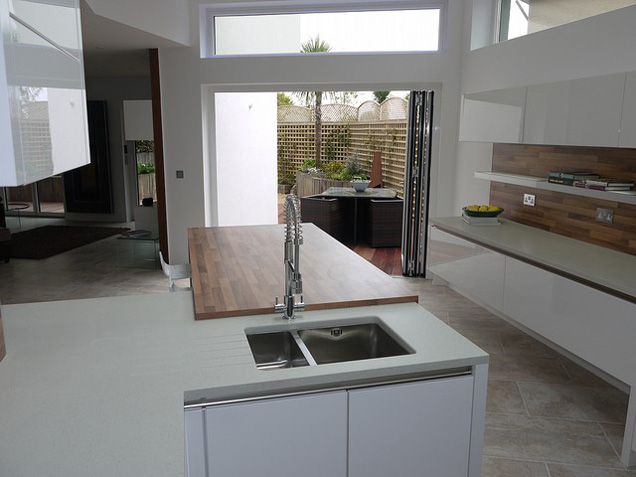
Eco-Friendly Kitchen Paint

Paint is made up of VOCs, or Volatile Organic Compounds; these compounds keep the ingredients blended but have the nasty habit of releasing into the air when paint is applied. When combined with other pollutants, VOCs create smog.

Look for low-VOC paint (with 50 g/L) or certified green paint with zero VOCs. Not only are you helping the environment, you’re also keeping the air inside of your home clean.

Recycled Materials
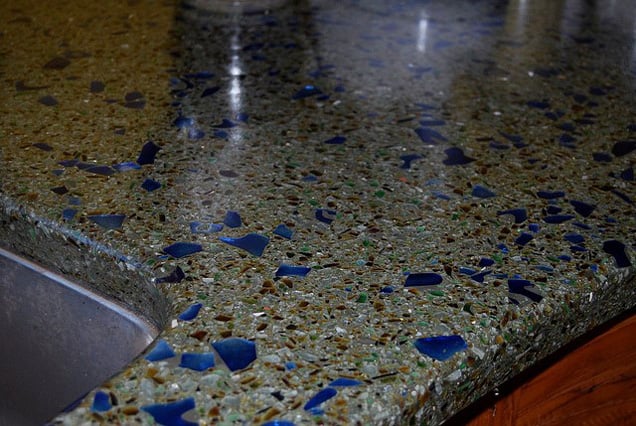
Recycled Material Countertop

We’ve touched on recycled materials a bit throughout this guide, with reclaimed wood and bamboo as obvious eco-friendly materials. However, there are other options like 85 percent recycled glass and Squak Mountain Stone made up of recycled paper, recycled glass, and low-carbon cement.

Remember, knowledge is power. Ask where the materials came from and what they’re made of before you buy them.

Energy-Saving Appliances
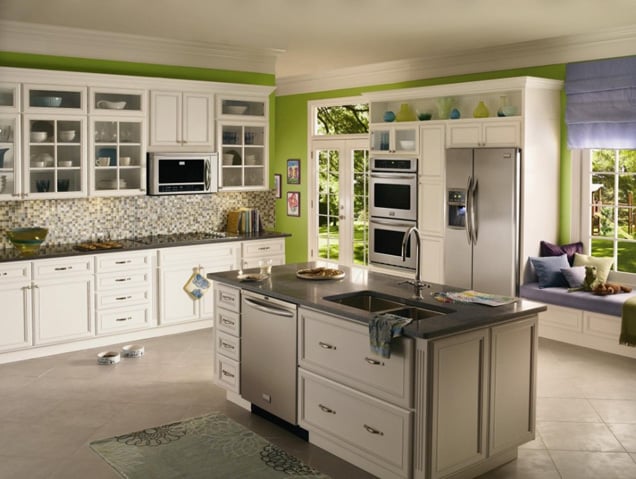
Kitchen with Energy Saving Appliances

You probably know to look for Energy Star appliances, but do you know how the EPA awards that label? The product must contribute to significant energy savings nationwide and provide the same performance as its less-efficient counterpart.

Also, if the product costs more, the consumer must be able to make up the cost through decreased utility bills within a small period of time. This means that it’s worth paying more for an Energy Star appliance, because you’re guaranteed to get your extra cost back.

Cabinetry Trends in 2014

Image courtesy of kitchencabinetkings.com

Designers are thinking outside the box to make cooking easier with unique kitchen cabinets, from built-in space racks to roll-out trays. The name of the game in 2014 is efficiency.

Specialty Cabinets
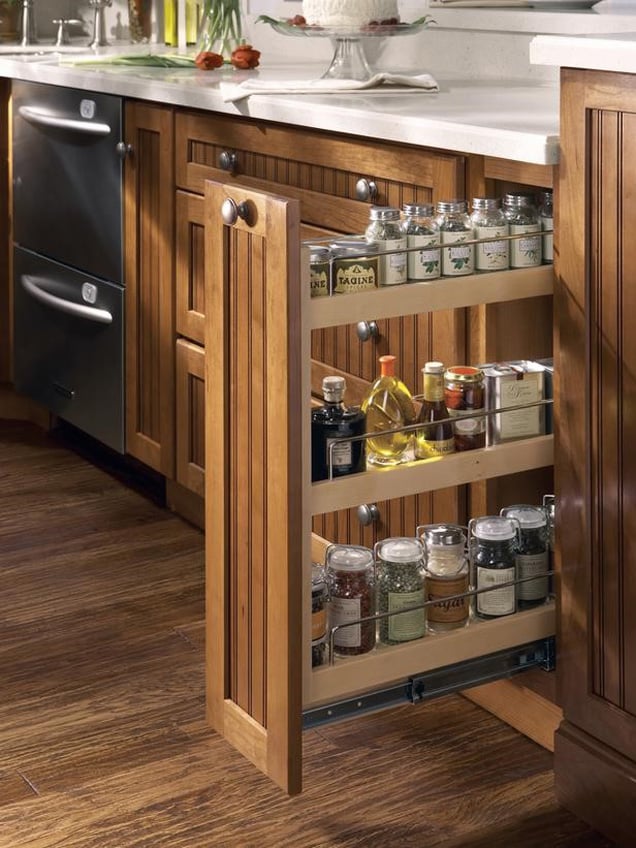
Pull-Out Spice Rack Cabinet

Instead of building a kitchen with cookie-cutter cabinets that can’t fit anything, consider trendier specialty cabinets. Look into hidden storage options like spice racks, inserts for hanging pots and pans, and multi-layered pull-outs for dry goods. This option is better for homeowners who aren’t planning to sell for a long time, as you can create the perfect layout and grab any gadget or tool you need on a moment’s notice.

You can also add built-in dividers to drawers to organize silverware and cooking utensils. These drawers keep more clutter off your counters and hide it away in an organized fashion.

Distressed Finishes
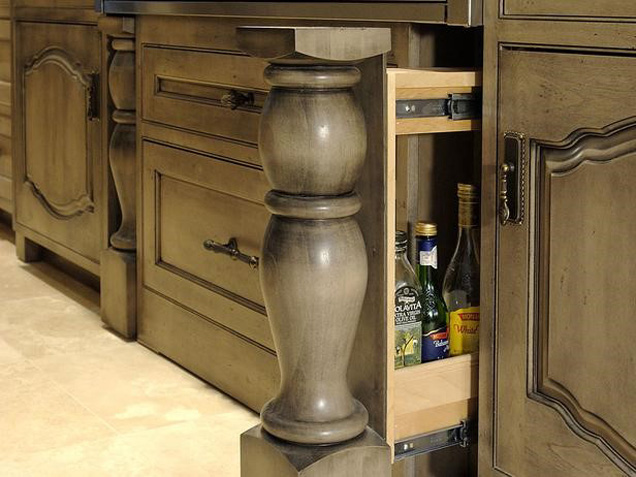
Distressed Leg Pull-Out Spice Rack

Popular finish choices for 2014 include – you guessed it – aged and distressed. Choose a cabinet finish that complements, but doesn’t match your floors and countertops. A distressed look is created when parts of the finish are rubbed away to expose the wood underneath, and they’re then refinished with a glaze to darken all of the grooves.

Pair distressed cabinets with a subtle marble or wood countertop and an integrated or apron-front sink. This style is both rustic and classic, and will handle wear and tear better than perfectly finished cabinets. Your cabinets are distressed, but you won’t be!

Color Schemes
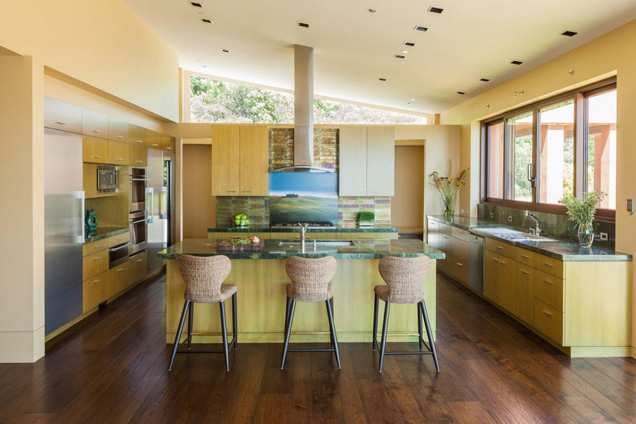
Vibrant Yellow Kitchen

Instead of a wood finish, some people are grabbing a brush and adding a splash of color on their kitchen cabinets. Pastel blues complement the browns from your flooring, while a spicy red warms up the room.

One trend that we’ve seen more of is painting kitchen cabinets two different colors. For example, designers are painting the doors a different color than the trim or painting the top cabinets a lighter color than the bottom ones.

Because cabinets occupy most of your kitchen wall space, think of your cabinet designs like your wall color. They will affect the mood of the room and the way natural and artificial light fills the space. What feels do you want to evoke in your design?

Kitchen Appliance Trends in 2014

Aesthetic is important, but if your appliances are broken or outdated, you won’t spend much time in your beautiful kitchen. In 2014, homeowners are choosing restaurant-quality appliances. After all, everyone wants to be Gordon Ramsey in the confines of their home.

Chef’s Stove
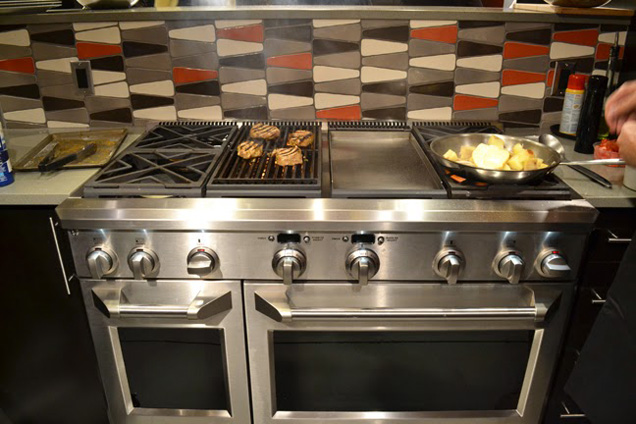
GE Monogram Chef's Stove

If you’re embracing the stainless steel design, then a chef’s stove is a must. In fact, 50 percent of homeowners said it was their dream kitchen appliance. These stoves can handle woks, griddles, and everything in between. Installing a professional grade stove means you’ll never blame the appliance for ruining your food.

Double Ovens
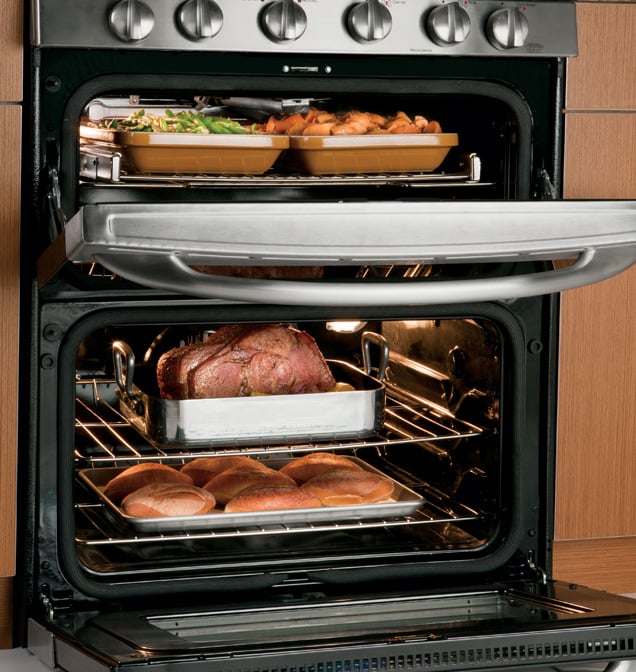
GE Monogram Double Oven

This one goes hand in hand with the prep sinks we discussed earlier. If you’re making a full Thanksgiving dinner, you can’t fit the turkey and the pumpkin pie in the same oven. Double ovens give you more space, options, and flexibility to create perfect meals.

Refrigerators
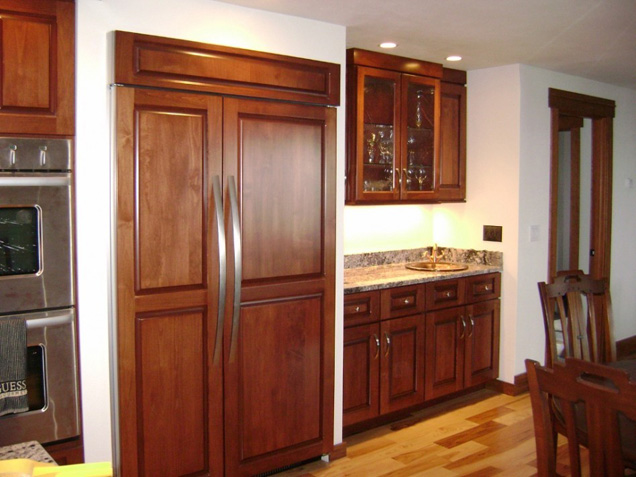
Refrigerator with Integrated Wood Panels

We’ve already touched on Wi-Fi refrigerators, but what about their design patterns? Some prefer to stick with the stainless steel, but designers tend to be split between hiding their refrigerators behind cabinet wood paneling or making them a focal point by choosing one in a non-conventional color like red.

In short, Instead of a bulky white or silver box, people are opting for furniture-like appliances that match their designs.

Dishwashers
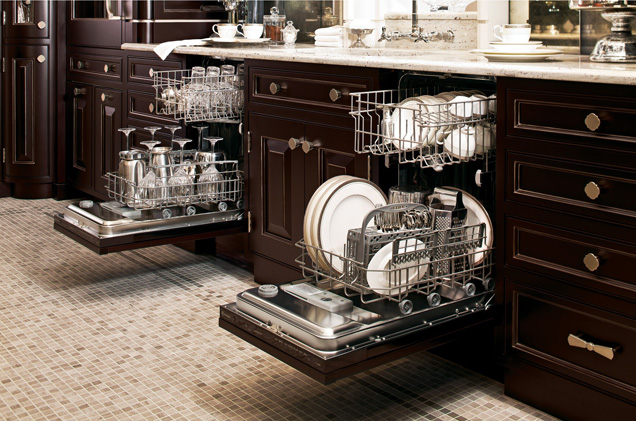
Custom Panel Integrated Dishwasher

While stainless steel dishwashers are always going to be highly sought-after, many other dishwasher trends are beginning to make waves. For people looking to create a seamless look throughout their house with an integrated sink and a hidden refrigerator, they’re choosing a dishwasher that will also blend in with their cabinetry.

The standard one-size-fits-all dishwasher is quickly becoming a thing of the past. Many homeowners are choosing to fit double dishwashers into their kitchens. These dishwashers have full separate compartments that can run at different times. They let you wash delicate crystal and heavily soiled baking dishes separately.

There’s also in-sink dishwashers that let you run a small load in half the time it takes to clean them normally. Many internal dimensions are changing as well. Some dishwashers now allow for taller pots and pans on the inside while the outside remains the same size as a standard washer. Many people are also looking for more noise regulated dishwashers since more homes are embracing the open concept. No one wants to hear the noisy dishwasher while they unwind in the living room after a big meal.

What Do You Think?

Rustic and hyper-modern are two common trends in 2014. Homeowners are either investing in smart appliances and stainless steel restaurant-grade everything, or they’re going back to their roots with copper sinks and reclaimed wood. This combination has actually created a third option: the transitional kitchen, which walks the line between the two.

Which of these trends do you like? Do you love the look of copper? Does aged wood make you feel distressed? Your remodeling choices will keep a trend going or make it die, so tell us what works and what doesn’t!

Whichever path you choose to take, make sure it’s something you love. After all, you probably spend a lot of time in the kitchen.