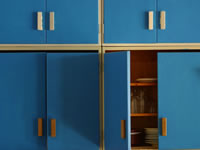
This article provides some quick and easy directions on the basic steps needed to paint kitchen cabinets. If you buy our unfinished cabinets, you can skip the first step as well as several others if you paint them before installation. We recommend Maple wood since it has the least amount of grain to show through light colored paint.
Custom Cabinet and Bookcase Design Blog
Informative articles about how to layout, order, install custom bookcases and cabinets.

Recent Articles
- Small Kitchen Organization Ideas for an RV Kitchen
- Make a ClosetMaid Cubeical Partition Bookcase
- Do I need a contractor for my kitchen project?
- Best Locations for a Custom Bookcase
- The Best Cabinet Installation Tools
- How To Install A Blind Kitchen Corner Base Cabinet
- How Supply Chain Problems Affect Cabinet Manufacturers, Contractors, and Homeowners
- What Type of Wood is Best for Furniture, Cabinets, or Bookcases?
- Kitchen Cabinet Layouts for Design Symmetry
- Convert Glass Doors to Wire Mesh
- The Home Office Tax Deduction for Small-Business Owners
- Reimagining the office and work life after COVID-19
- How to Finish Unfinished Kitchen Cabinets
- Creating a Built-in Entertainment System
- Furniture Tariffs Soon to Hit Consumers
- How to Design the Ideal Home Office
- Creating a Great Entertainment System
- How to Build a Mudroom Bench
- The Most Novel Bookshelf Ideas
- Installing Crown Moulding
Archives
- January 2024
- September 2023
- August 2023
- July 2023
- March 2022
- September 2020
- August 2020
- July 2020
- April 2020
- August 2018
- July 2018
- June 2016
- February 2016
- October 2015
- September 2015
- May 2015
- March 2015
- February 2015
- January 2015
- December 2014
- November 2014
- October 2014
- August 2014
- July 2014
- June 2014
- May 2014
- April 2014
- February 2014
Categories
Search
© 2025 Custom Cabinet and Bookcase Design Blog. All rights reserved.
Design by picomol.de. Powered by WordPress.
