Make Your Own Roll-Away Kitchen Island
Step-by-step directions from Pat Simpson and Jodi Marks for building a moveable kitchen island.
Got island living on your mind? There are all sorts of island options available these days. If you're in the market for a DIY version that can roll, this project is for you.
Steps:
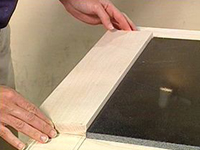
- Put on a dust mask and safety glasses and cut (see image 2) the plywood pieces using a table saw. Cut the pieces for the top, bottom and sides. These pieces will form the frame of the unit. Cut the wood with the finished side up to help prevent splintering.
- Make the initial rip cuts with the table saw, then use a circular saw to cut pieces to length. In this project, the sides measure 32-1/4-inches in height and the top and bottom measure 44.1/2-inches long. Make sure that the long edges of these pieces are straight.
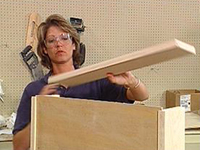
- Rip the solid maple 1x6s to a 2-inch width using the table saw. These pieces will be used to create the face frame for the kitchen island. After cutting the wood pieces sand the edges with 150-grit sandpaper to smooth out any rough areas.
- Attach a cleat to both the top and bottom of each of the side pieces, securing them with glue and nails. These cleats will support the top and bottom shelves of the kitchen island.
- Attach the plywood bottom and top pieces to the cleats, once again using glue and nails. Using a pneumatic nailer speeds up the process.
- Attach the center support piece (see image 3) and then begin working on the face frame. Apply glue to one edge of the cabinet and then secure the maple trim to the side using the pneumatic nailer.
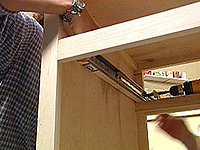
- Repeat the same process for the top and bottom trim pieces, also securing them to the edges (see image 4) with glue and nails.
- Attach the last side piece and the center trim piece. Add the horizontal support pieces and trim pieces for the drawers and then begin working on the other side of the kitchen island. Repeat the process on this side of the cabinet until all of the support pieces are attached and all of the edges trimmed out.
- Drill 3/8-inch holes to a depth of 1-3/4-inches into each of the four corners of the cabinet. Then insert the sockets provided by the manufacturer into each of the holes by tapping them in with a hammer. Insert the casters by pushing the caster stem into the socket until the stem locks (see image 5).
- Rip a piece of 1x6-inch maple trim to 4-1/2-inches wide using the table saw and then route both sides of one edge of all of the trim pieces. Be sure to wear eye protection and a dust mask whenever using a router.
- Once all of the pieces are routed lightly sand the edges to smooth out any rough spots. Attach the trim pieces to the top of the island using wood glue and 1-1/4-inch nails. Secure the maple trim from below so you don't have nail holes showing on the top.
- Apply glue to the backs of each of the trim pieces and place them on top of the kitchen island in the desired pattern (see image 6).
- Secure all of the pieces in place with nails driven in from the bottom of the cabinet.
- Create drawers by ripping a 1x6-inch maple board to size and then make dado cuts into each of the side pieces using the table saw. Assemble the drawer sides and secure them with glue and nails.
- After three sides are assembled, slide the bottom of the drawer into the dado groves and then attach the final side. Attach (see image 7) the drawer fronts with glue and nails. Route the edges of the drawer fronts for a nice finished look.
- Attach (see image 8) a couple of 2x2 support pieces then attach the drawer glides to these support pieces. Attach the other end of the glides to the drawers and test the operation of the drawers.
- Next, remove the drawers and attach the towel bar to one side of the island. Attach the false fronts to the opposite side of the kitchen island securing them with nails driven in from inside the cabinet.
- Go over the entire cabinet one more time filling any nail holes and gaps with quick-drying wood filler. Once the wood filler is dry, sand the cabinet one more time with a random orbit sander and 220-grit sandpaper.
- Wipe the cabinet with a clean, lint-free cloth to remove all of the dust created by the sanding. Begin applying the polyurethane clear coat. Apply with a paintbrush following the grain of the wood. Polyurethane will protect the wood surface from possible stains created by water or other liquids.
- Mark the locations for drawer pulls and drill pilot holes on the front of each of the drawers. Hold a drawer pull in place and insert the screw through the hole in the drawer front and into the pull.
- With all of the pulls installed, begin working on the door hinges. Insert the hinges into the pre-drilled holes on the back of the doors and secure (see image 9) the hinges with the screws provided by the manufacturer.
- Determine the locations for the doors and attached the doors to the cabinet.
Tools
table saw
3/4-inch maple plywood
1x6 solid maple boards
2x2 boards
dust mask
safety glasses
circular saw
150-grit sandpaper
cleats
wood glue
nails
pneumatic nailer (optional)
drill with 3/8-inch bit
hammer
casters and mounting hardware
router
towel bar
drawer pulls and hardware
water based polyurethane sealer
orbital sander with 220-grit sandpaper
quick-drying wood filler
lint-free towels
paintbrush
|
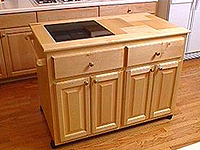
This roll-away kitchen island is convenient and attractive. |
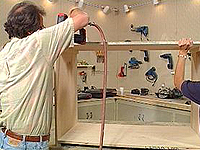
A table saw is required for creating the basic pieces. |
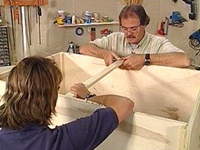
A center support piece stabilizes the island. |
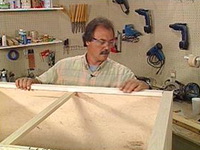
A gluing and nailing combo creates a permanent bond. |
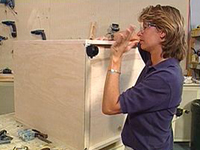
Casters and mounting hardware are available at most hardware stores. |
You can create a pattern for the top of your island with trim pieces. |
A drawer makes the island extra handy. |
Always test drawer glides before proceeding with the next step. |
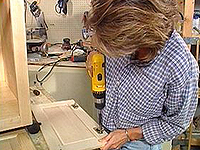
Doors that don't hang or close properly make an item look shoddy. |
